Introduction
Milesight 360° Panoramic Fisheye Network Camera, the panoramic camera, is born to bring superb user-experience especially featuring ultra high resolution up to 12MP. With exquisite design and customer-oriented idea, the camera fits for different installations like ceiling & wall and maximizes the convenience, achieving hassle-free installation and integrated cable management.
Four Different Installation Modes for Different Needs
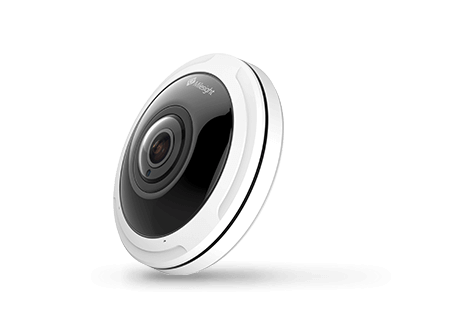
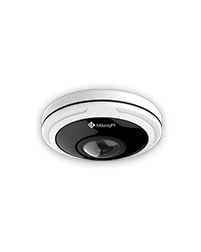
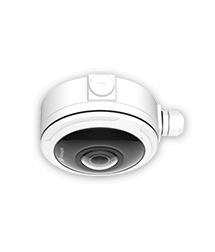
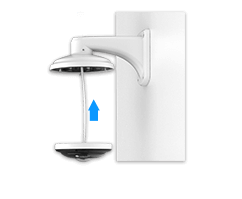
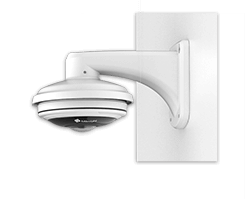
Considering different requirements from customers for specific installation environments, the Fisheye Camera accesses to four different installation modes. The Fisheye with the bracket (Picture 1) is the basic installation mode. Also, Milesight offers A75 (Picture 2) and A76 (Picture 3) for convenient cables management and ceiling or vertical structure. For wall or parapet installation, A72 (Picture 4) is available.
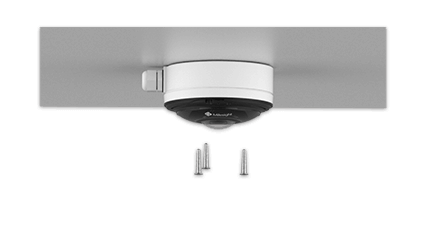
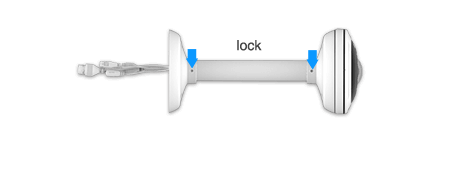
Installed with Mounting Bracket

Installed with Mounting Bracket
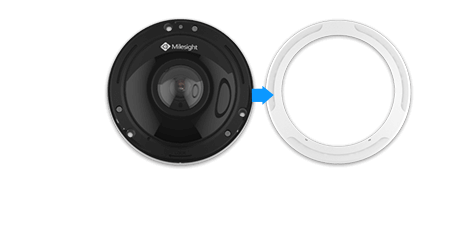
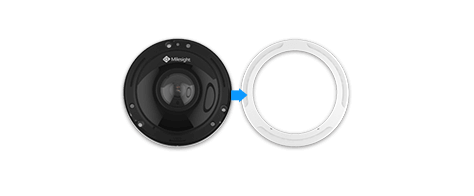
Step 1: Turn the top cover anticlockwise and take it off.
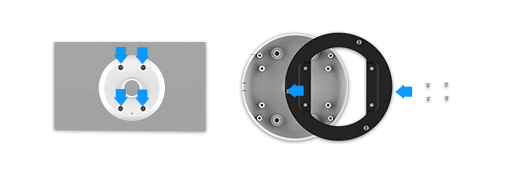
Step 2: Fix the bracket on ceiling or wall where the camera is intended to be installed.
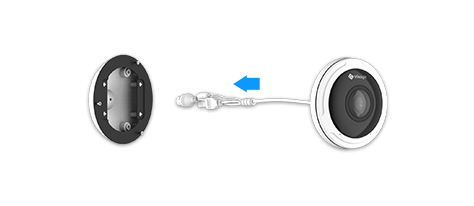
Step 3: Connect cables, rotate the camera to the bracket clockwise;
Step 4: Fix the bracket on ceiling or wall where the camera is intended to be installed.
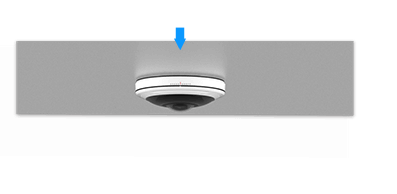
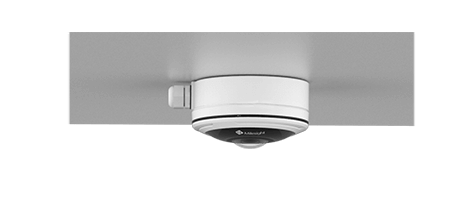
Installed with A75 Junction Box
Installation Environment:
For the containing of electrical connections which need to be concealed from sight and deter tampering.

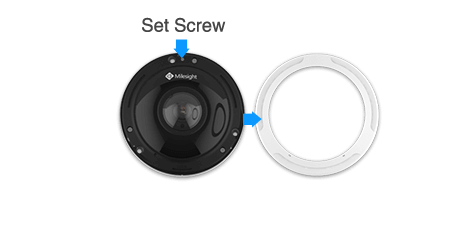
Step 1: Turn the top cover anticlockwise and take it off.
Step 2: Fix junction box in the position where the camera is intended to be installed;
Step 3: Put through the cables through the rubber plug side or the hole centric to connect them.
Step 4: Secure the camera on the junction box;
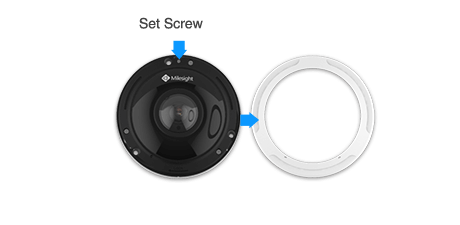
Step 5: Tighten the set screw. Then turn the top cover clockwise till the anchor points are aligned.
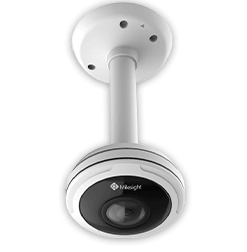
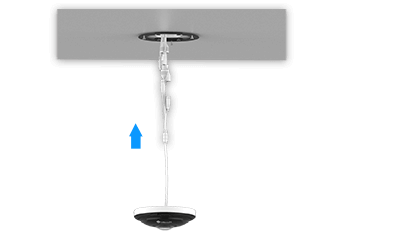
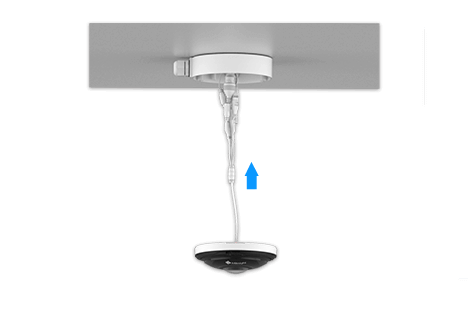
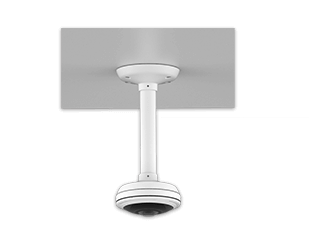
Installed with A76 Pendent Mount
Installation Environment:
Used to install camera on an ceiling or horizontal structure.
Step 1: Turn the top cover anticlockwise and take it off.
Step 2: Mark holes with the pendant head, and then drill 4 holes in the ceiling. Then Secure the bracket with pendant base;
Step 3: Put the cables through the pendant base and then rotate the camera clockwise;
Step 4: Tighten the set screws to fix the camera, then turn the top cover clockwise till the anchor points are aligned;
Step 5: Put the cables through the pendant pipe. And rotate it with the base and secure set screws. Put the cables through the pendant head, and rotate it with the pipe and secure set screws;
Step 6: Fix the whole pendant and camera to the drilled holes in ceiling.
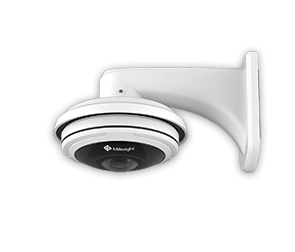
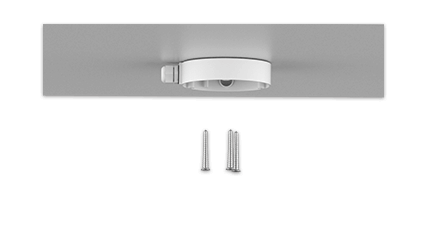
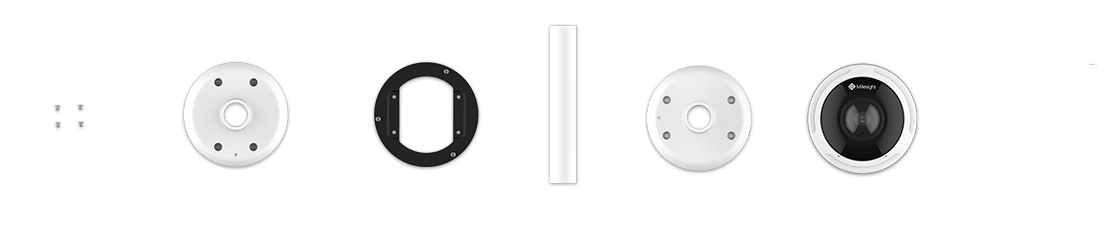
Installed with A72 Wall Mount
Installation Environment:For wall or parapet installations.

Step 1: Turn the top cover anticlockwise and take it off;

Step 2: Secure the screws to fix the A72 Wall Mount on the wall or parapet;
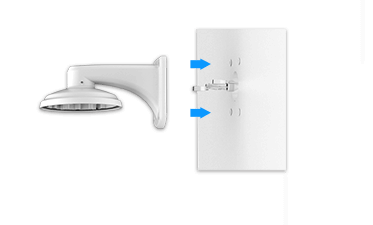
Step 3: Fix the bracket on the head of the A72 with the screws corresponding to the holes;
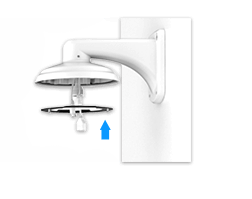
Step 4: Connect cables, rotate the camera to the bracket clockwise;
Step 5: Tighten the set screw. Then turn the top cover clockwise till the anchor points are aligned.
Conclusion
Supporting four different installation modes, the Fisheye Network Camera could be regarded as a true user-friendly one. Various accessories satisfy different installation requirements making the installation much more flexible and convenient.