Milesight-Troubleshooting-How to add Third-party cameras to PoE NVR
Milesight-Troubleshooting-How to use PoE NVR.pdf

1. LAN Port and PoE Ports
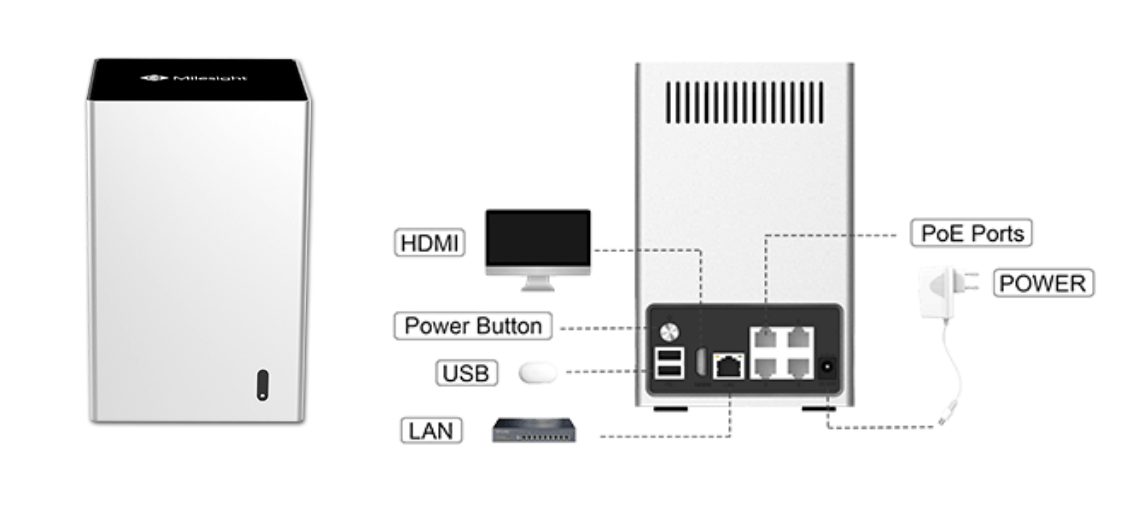
Intuitively, there is one LAN port and four PoE ports in the MS-N1009-UPT.
For the LAN port, the default IP address is 192.168.5.200. You can set the local IP for the NVR via Smart Tools which you can download from the official website of Milesight . And you can log-in the NVR to manage it via web by using the IP address.
For the PoE ports, each port has a fixed number like the above picture showing. They can be directly used to connect to the Milesight cameras.
Note: The PoE interfaces are only working for Milesight cameras.
2. How to use PoE ports
For MS-N1009-UPT, the default IP address and password of the 4 PoE channels are 192.168.20.xx and ms1234.
When you put the IP camera into the PoE port,
1) It can plug and play as long as its password is ms1234.
For example: IPC1: 192.168.7.82 Password: ms1234
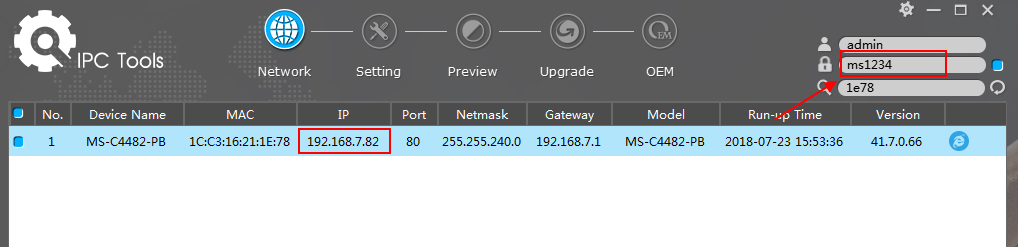
Plug in and refresh.
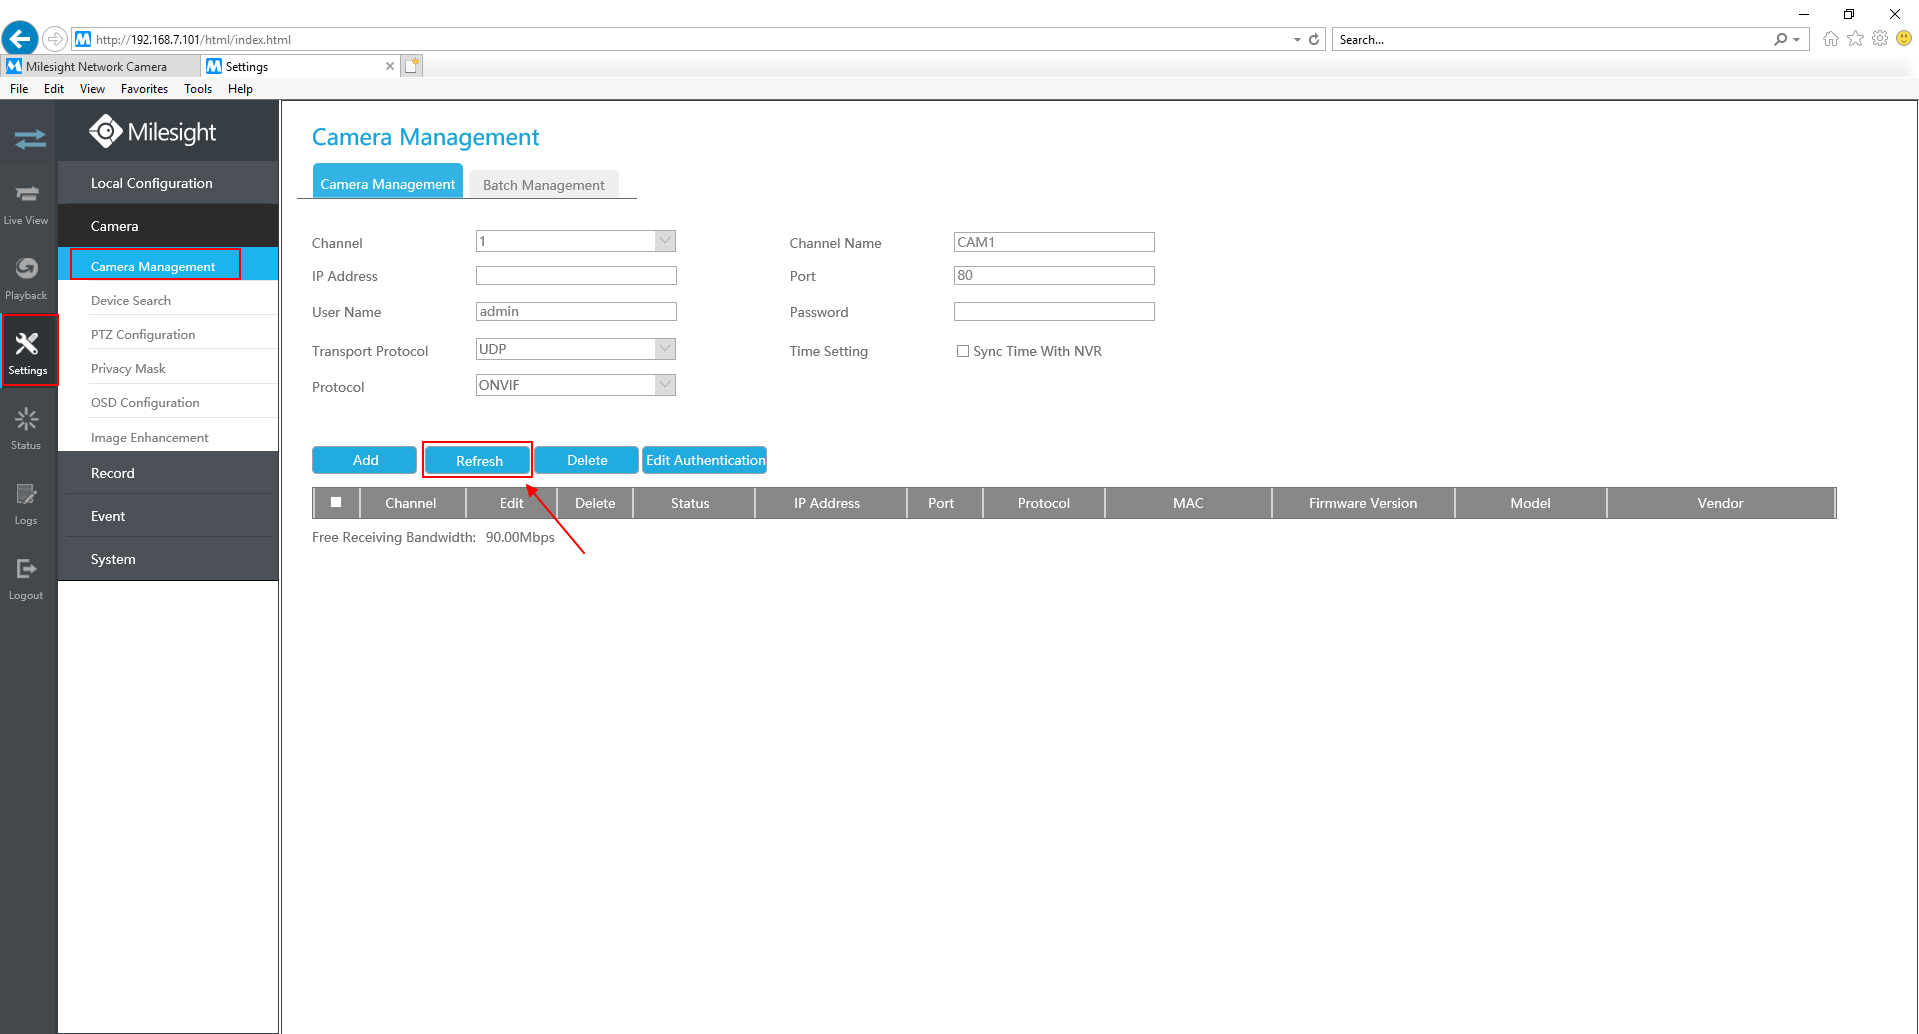
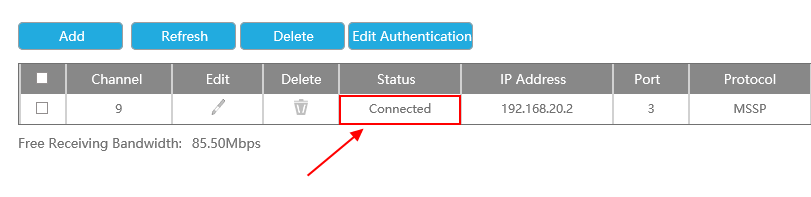
You will find that the IP address has been changed into 192.168.20.xx. And it shows “Connected”.
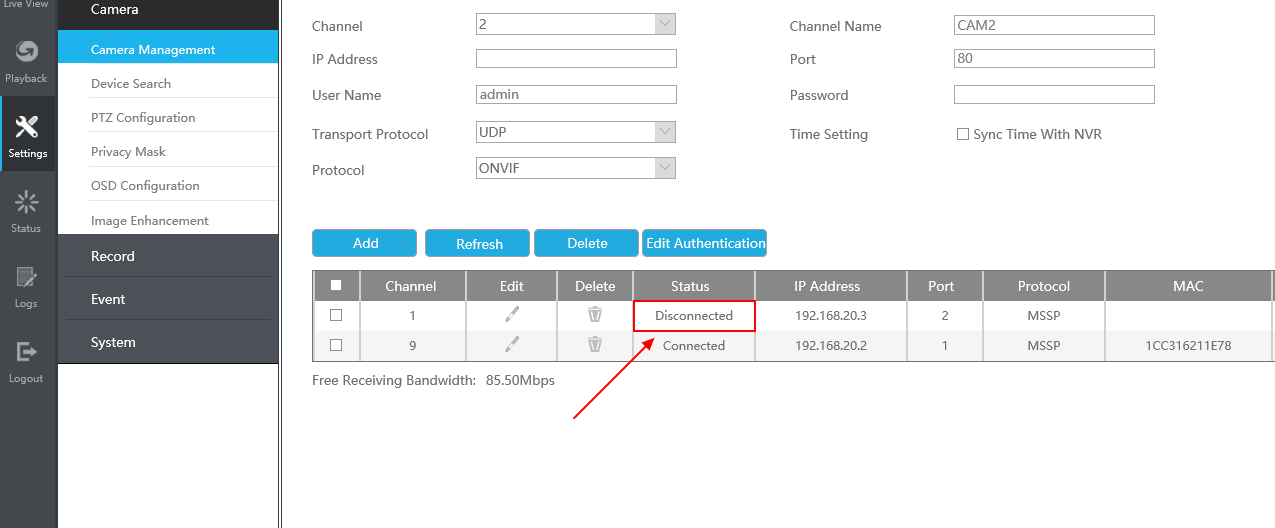
2) When the password of the IP camera is not ms1234, we can make it connected through editing the exact password of the IP camera.
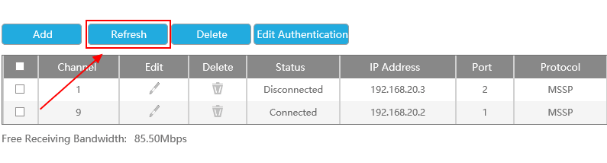
For example: IPC2:192.168.20.3 Password: 123456
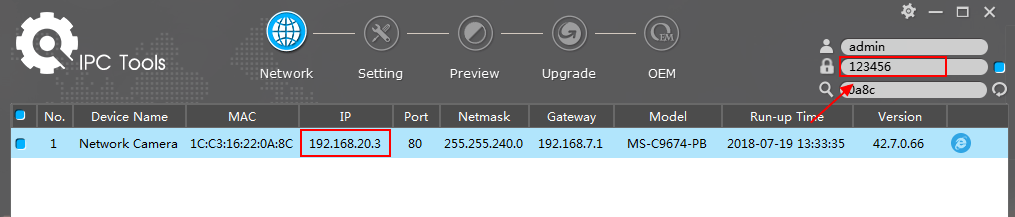
Plug in and refresh.
The password of the IP camera is not the same as the channel, so it will show the state ”Disconnected”.
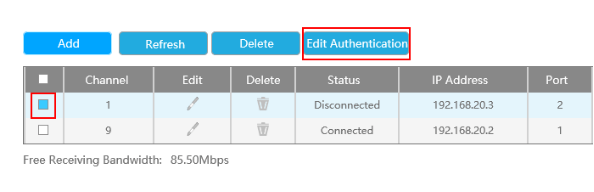
One way:
Check the “Disconnected” IP camera, then click on “Edit Authentication”.
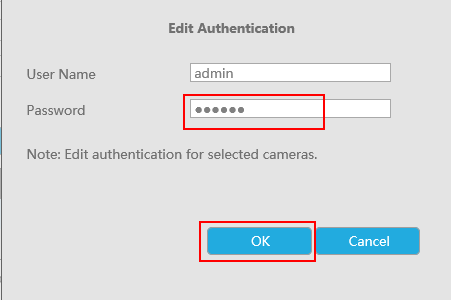
After clicking on the button, it will pop up a window as follows. Then input the exact password “123456” and click on “OK”.
The other way:
Click on the button “Edit”.

After clicking on the button, it will pop up a window as follows. Then input the exact password “123456” and click on “OK”.
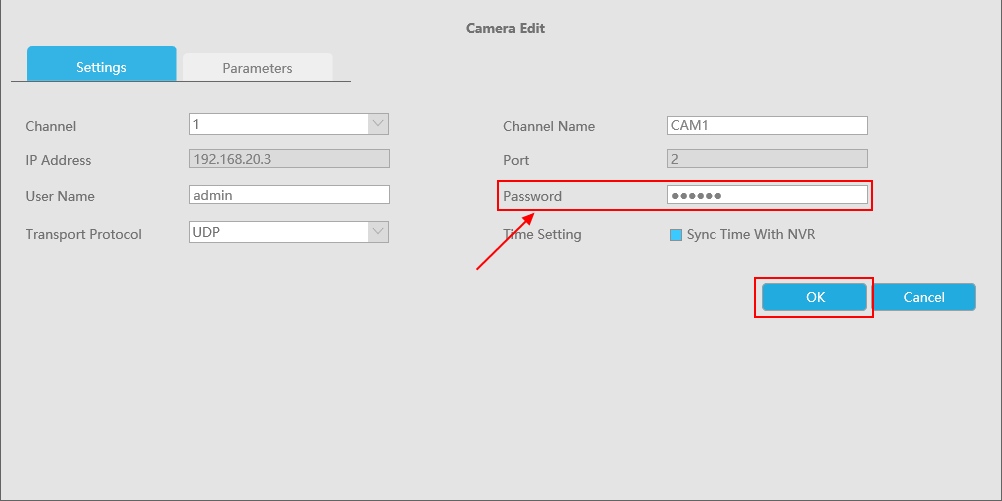
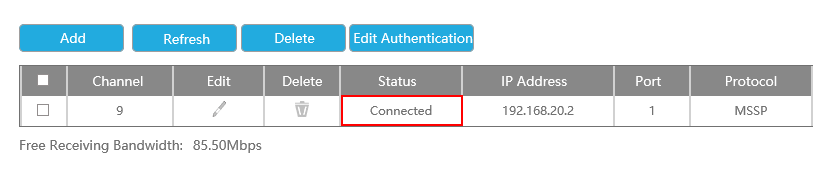
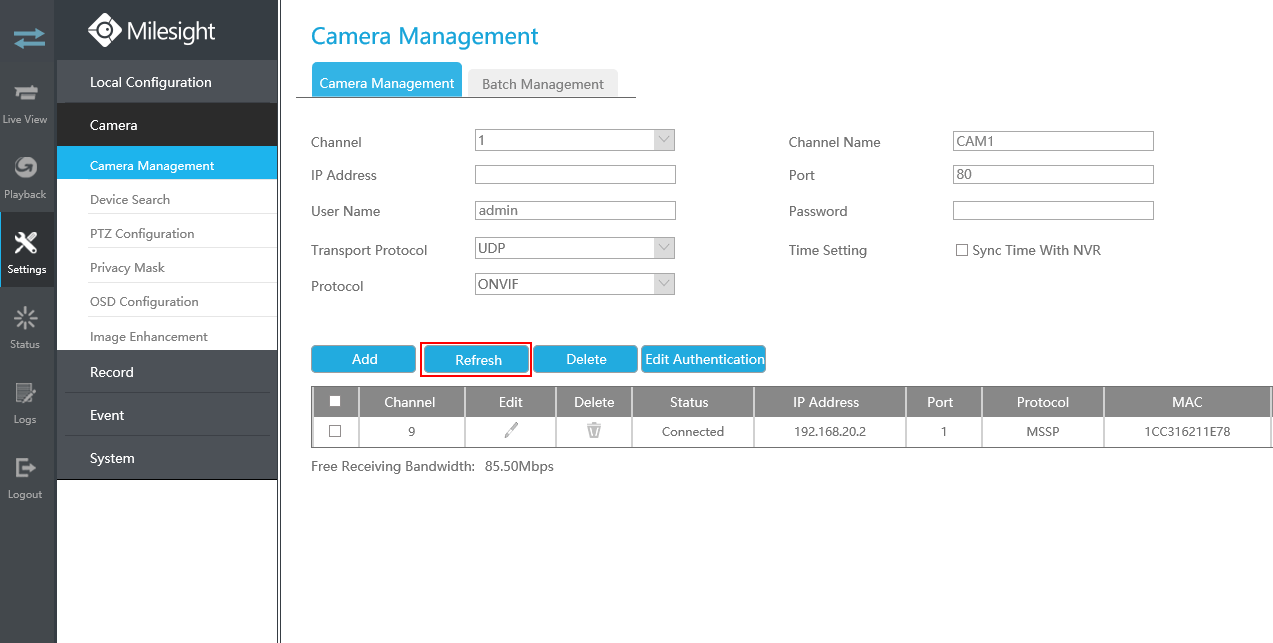
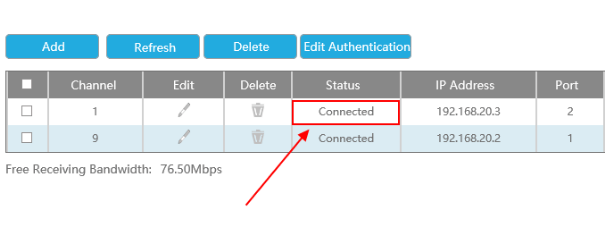
After saving the password, refresh the state, it will show “Connected”.
3) If the IP camera has ever connected into the random PoE port , even if its IP address changed after pulling out , as long as the password is not changed, you can plug in random PoE port without verifying password anymore.
On the contrary, you need to verify the password if you changed the password of the IP camera.
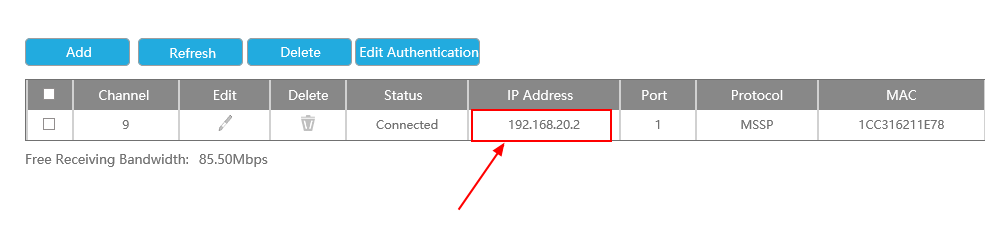
For example: IPC3 :192.168.20.2 password: 123456
Previously it connected in Port1.
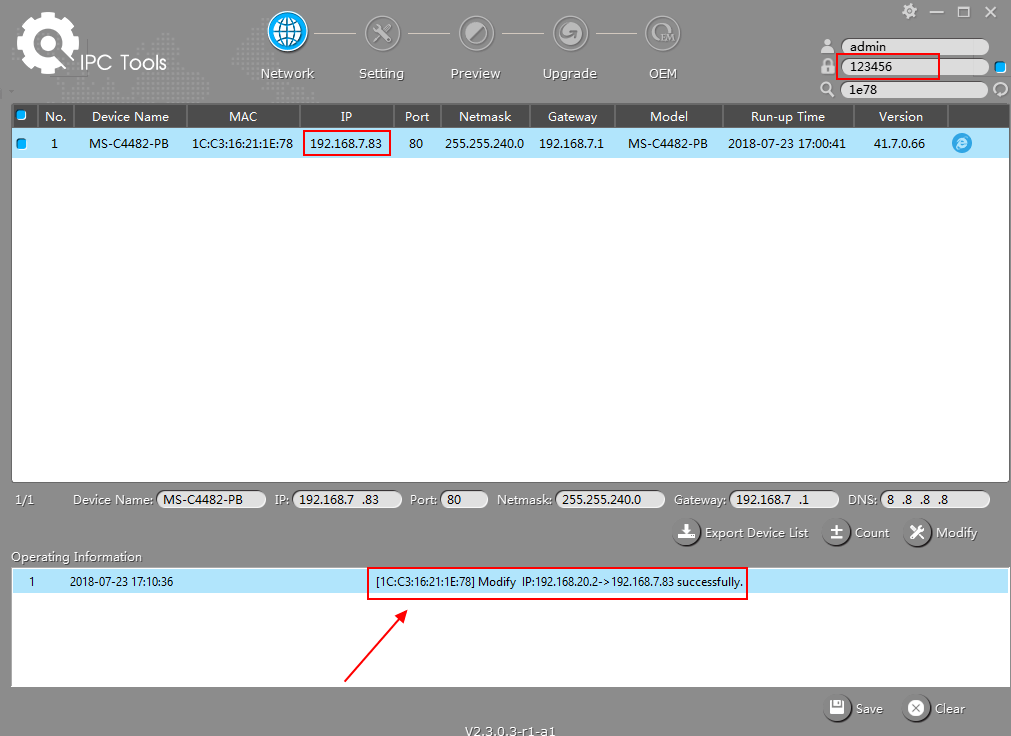
Pull out the IPC3 and edit the IP address into 192.168.7.83, but don’t change the password.
Now put it into Port3. Just refresh, then you will find that it has been connected in Port3 without verifying password and the IP address has been changed into 192.168.20.xx.
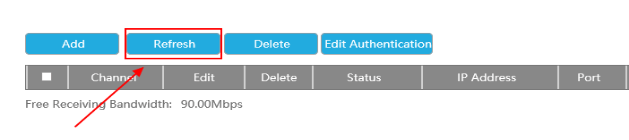
If you have done the right steps, but you find that the state is “Disconnected”. Please keep clicking on the “Refresh” till “Connected” comes out.
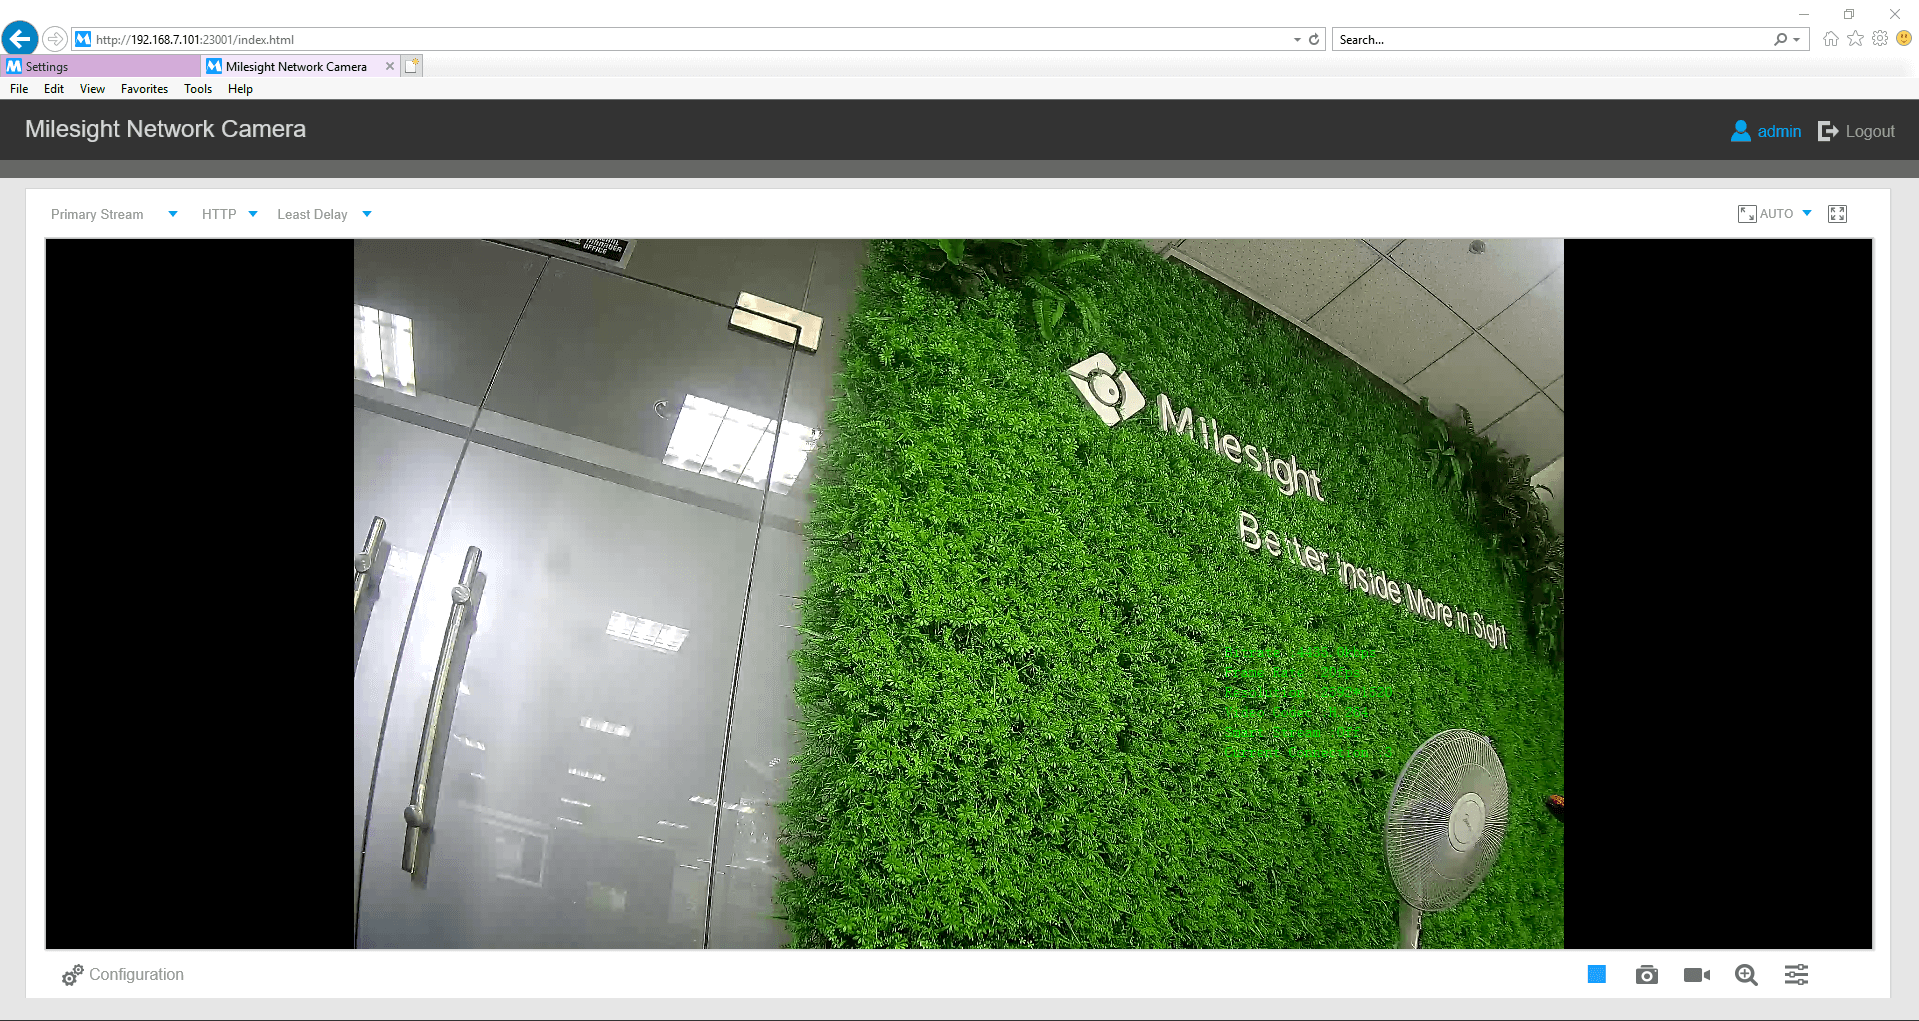
3. How to configure IP camera connected via PoE
For the network cameras connected with PoE NVR via PoE ports, you can not view or configure them on web directly because the IP network segments of IP camera and your PC are different. There are two ways to solve this issue.
One way:
1) Connect PC to one of the PoE ports of PoE NVR using a network cable;
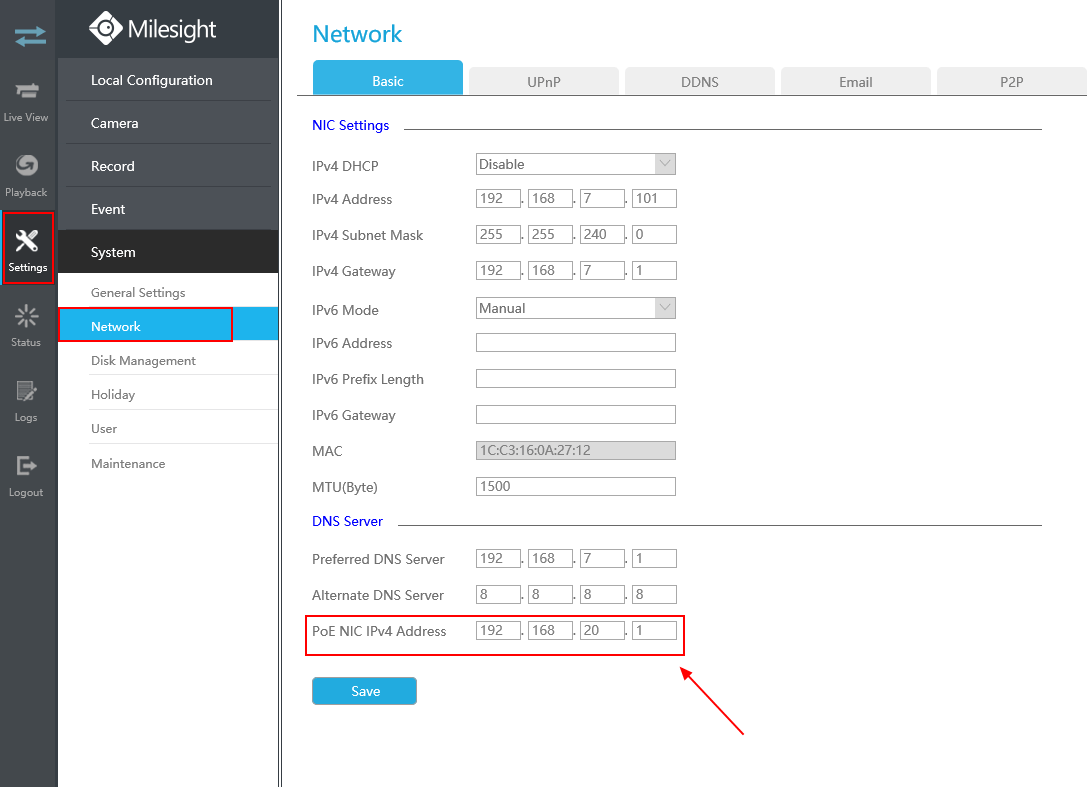
2) Add an IP address to your PC which is in the same network segment with the PoE port settings;
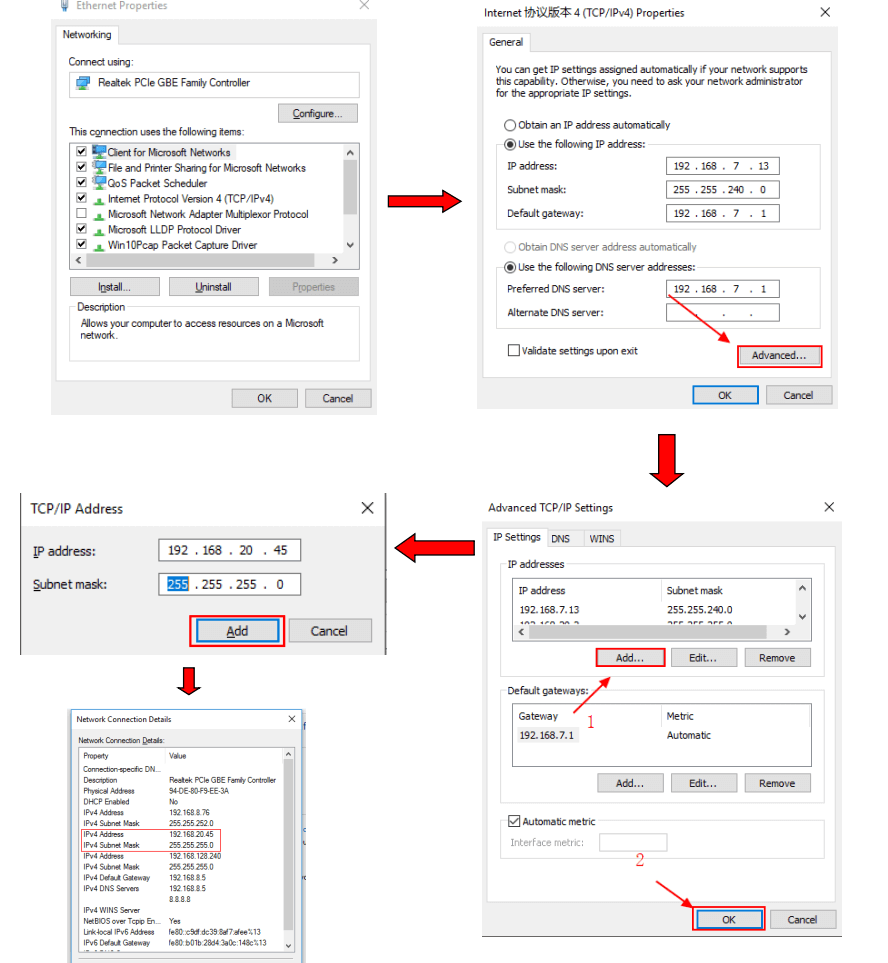
3) Then you can view and configure both PoE NVR and IP camera directly on web using corresponding IP address.

The other way:
1) Enable the “ Channel Access” in Setting and saving.
Note: This setting is disabled by default.
2) Click on the "IE" button.
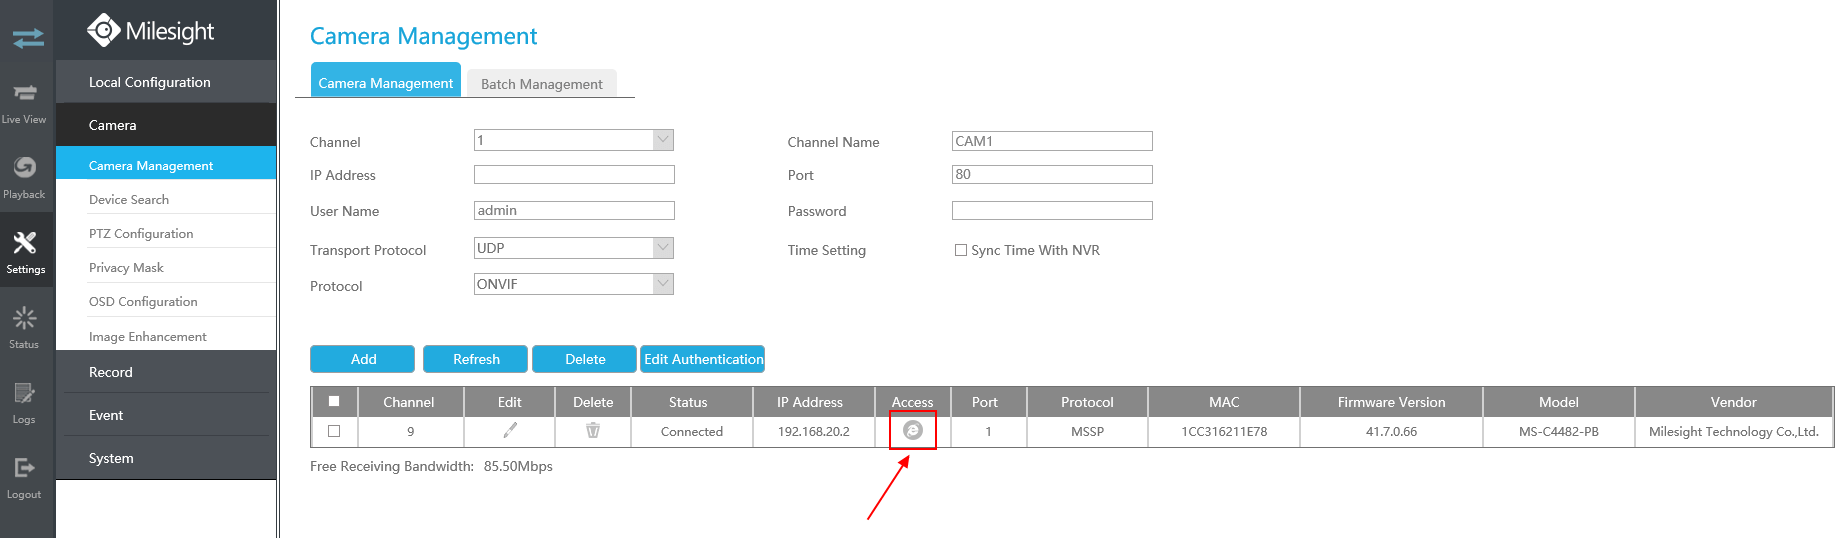
3) After clicking on the button, it will pop up a window as follows.
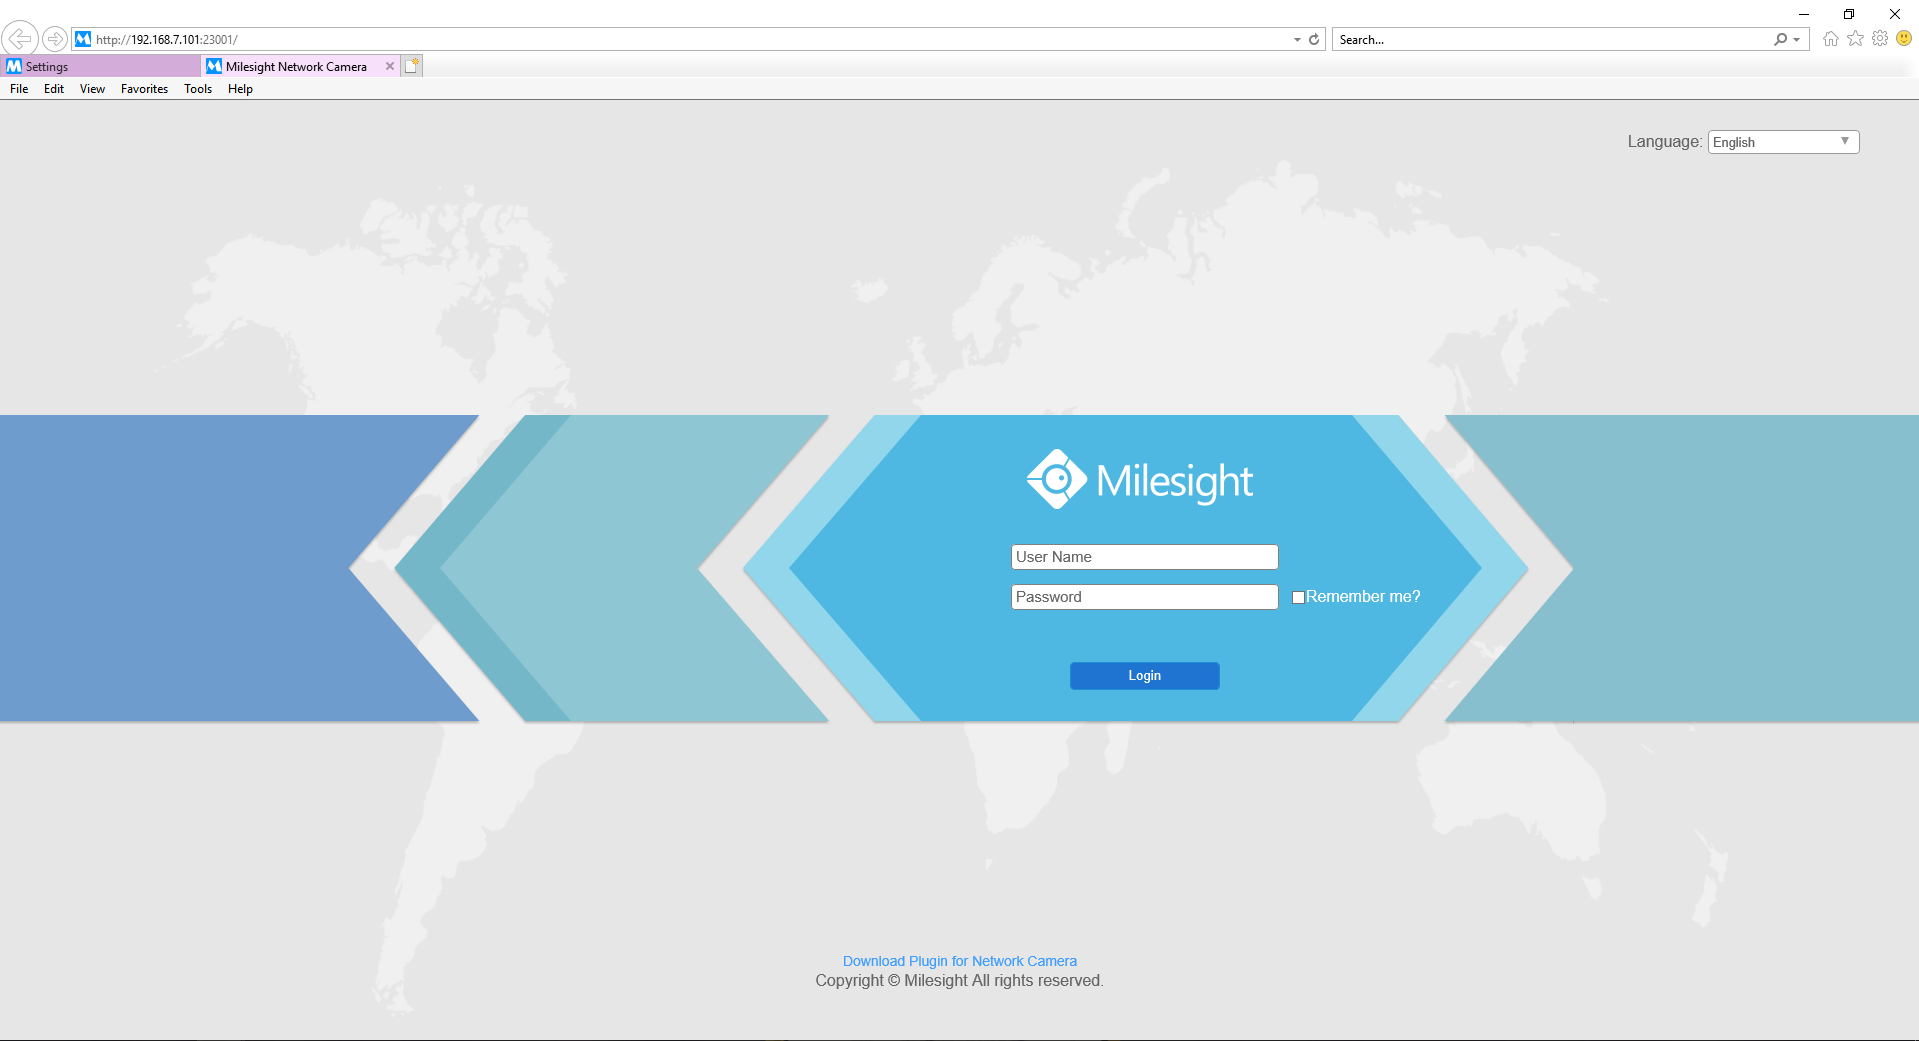
4) Input the user name and password,Then you can view and configure IP camera directly on web.