Milesight-Troubleshooting-Hard Disk Installation
Milesight-Troubleshooting-Hard Disk Installation.pdf

1. MS-N7000 series Hard Disk Installation
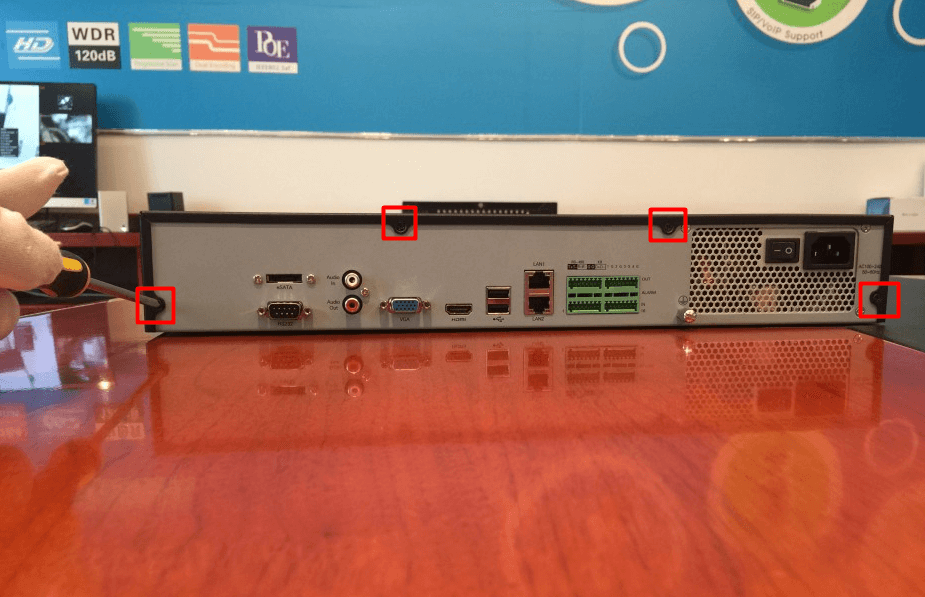
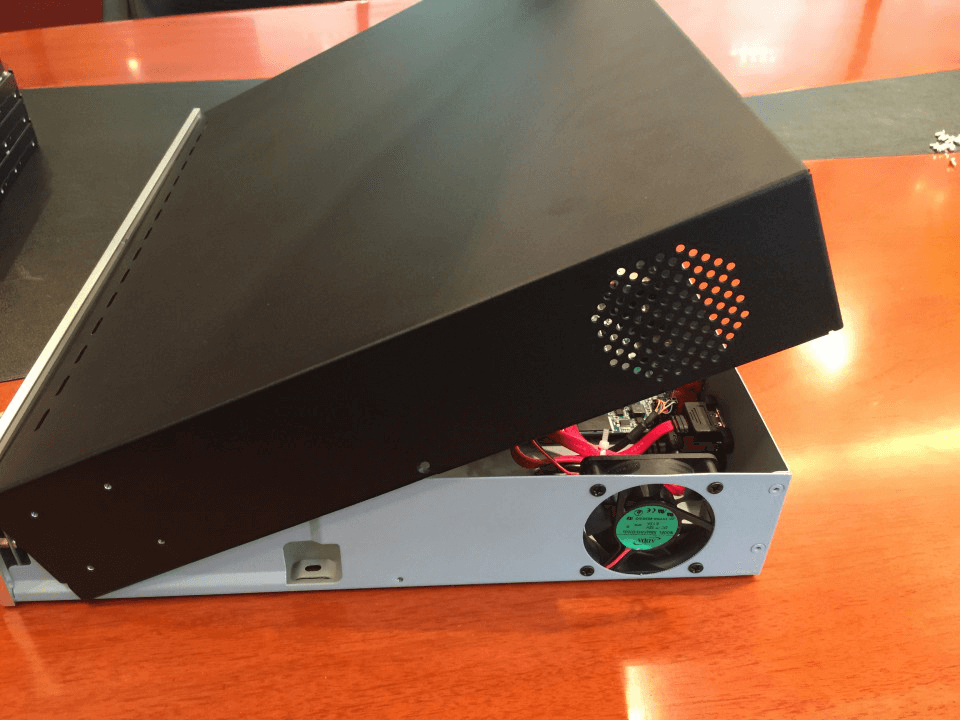
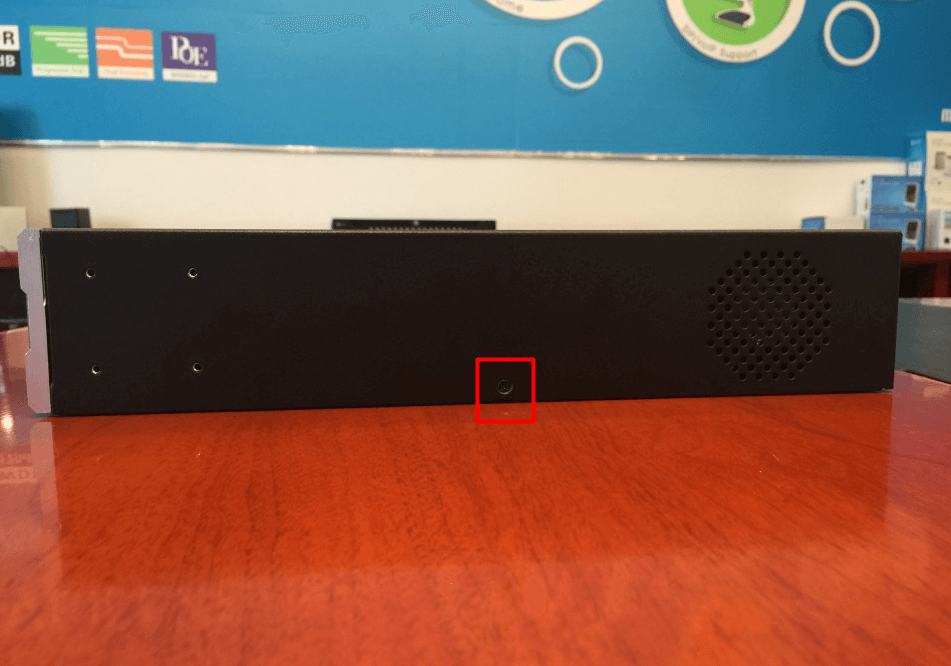
Step1: Unscrew the back and both sides’ screws to open the upper lid.

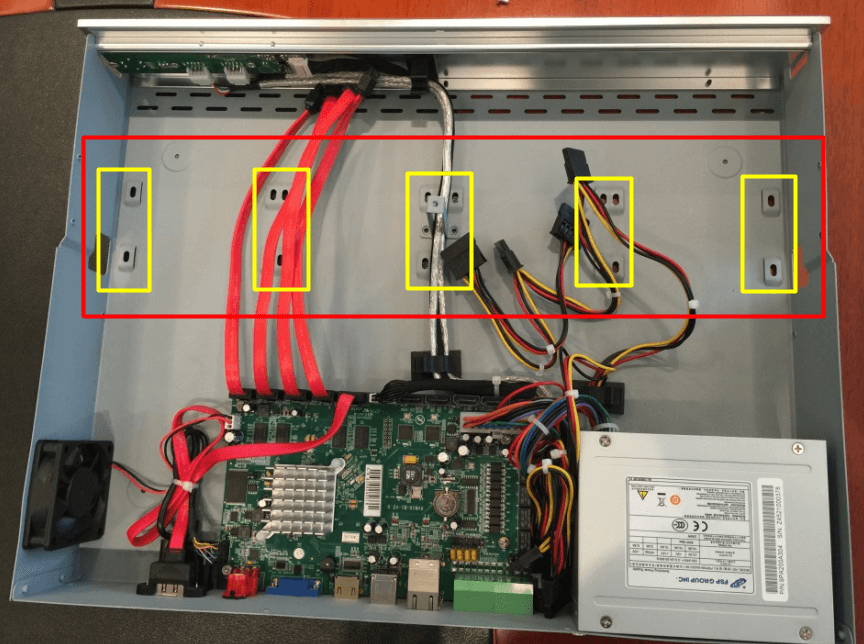
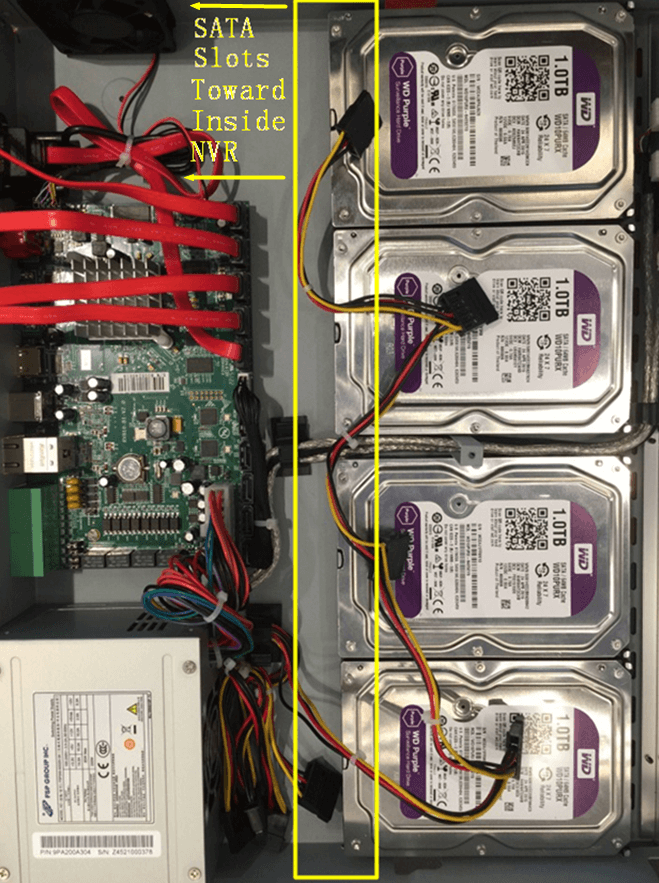
Step2: Install the hard disks into NVR with screws showed in below pictures.(SATA Slots of hard disk should be toward inside NVR.)


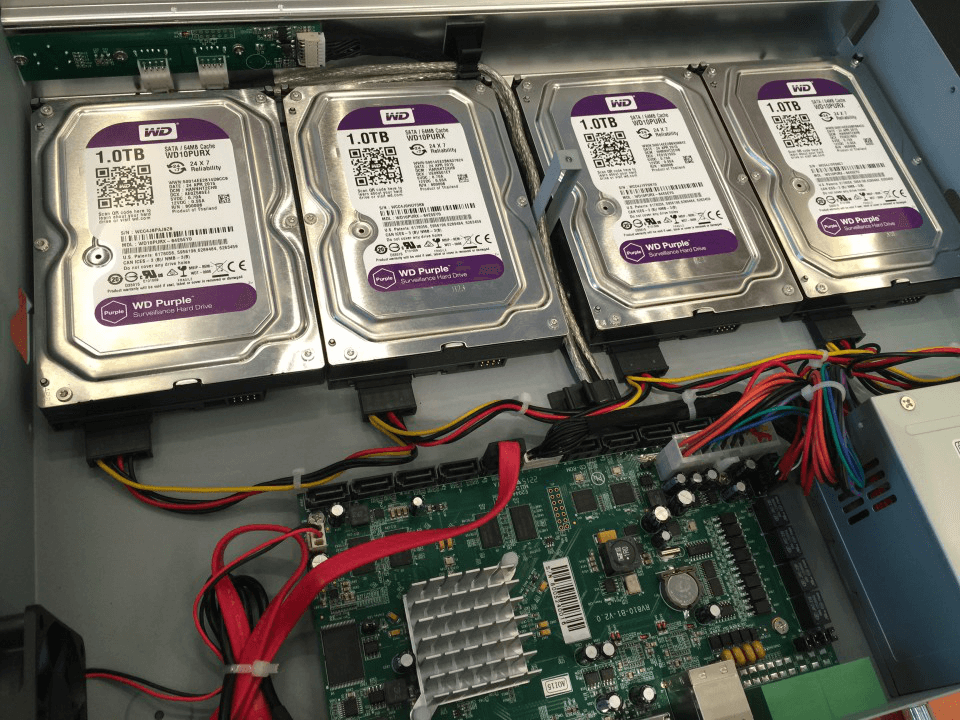
Step3: Join the power and data connectors to corresponding hard disk.
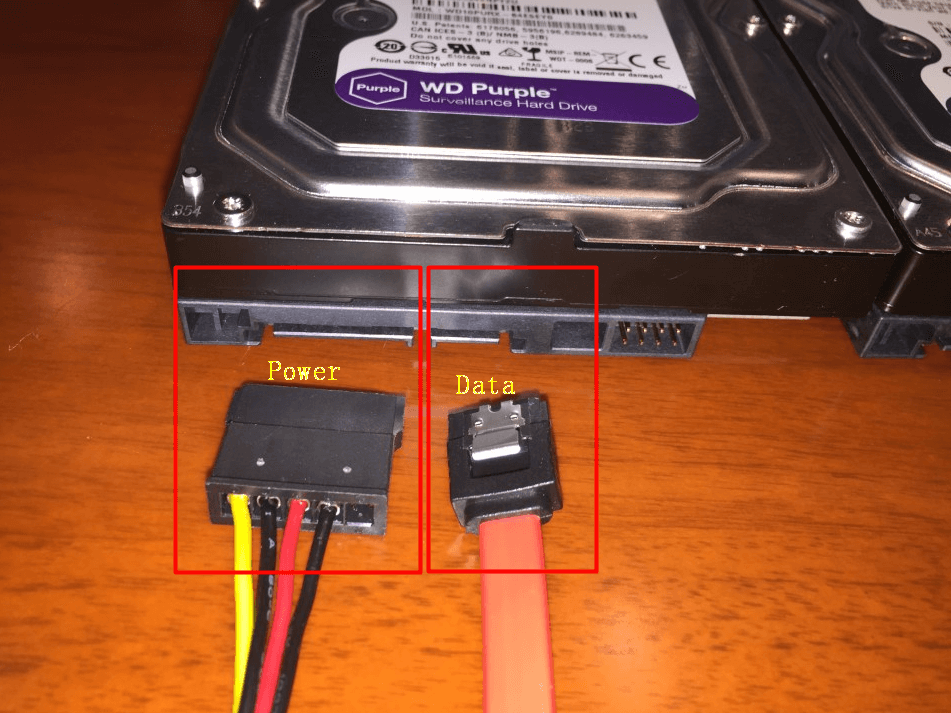
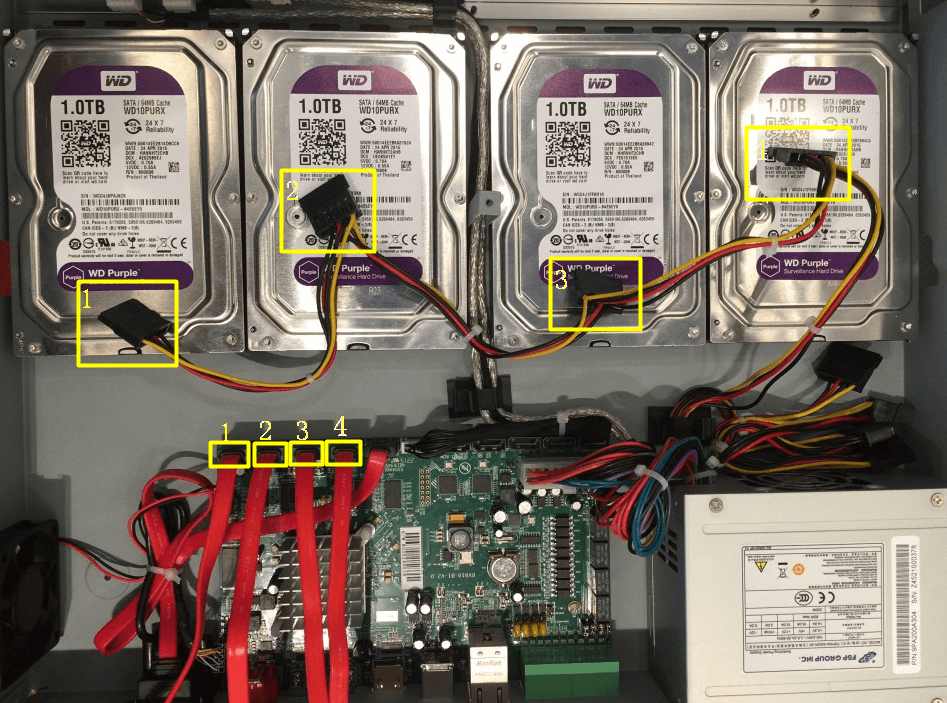
The data connector sequence of MS-N7000 series is different from MS-N8000 series.
2. MS-N8000 series Hard Disk Installation
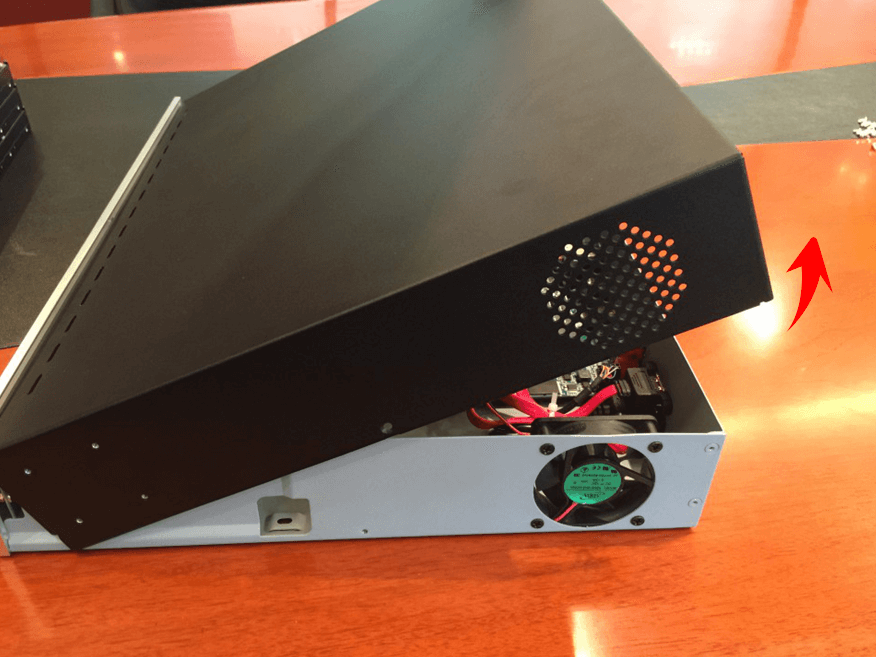
Step1: Unscrew the back and both sides’ screws to open the upper lid.

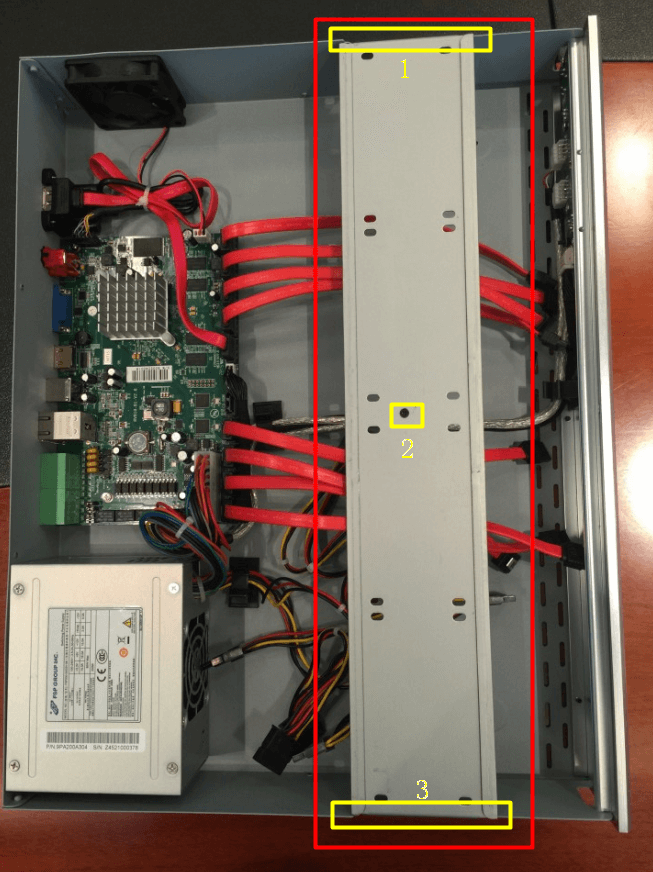
Step2: Uninstall the upper hard disk panel.
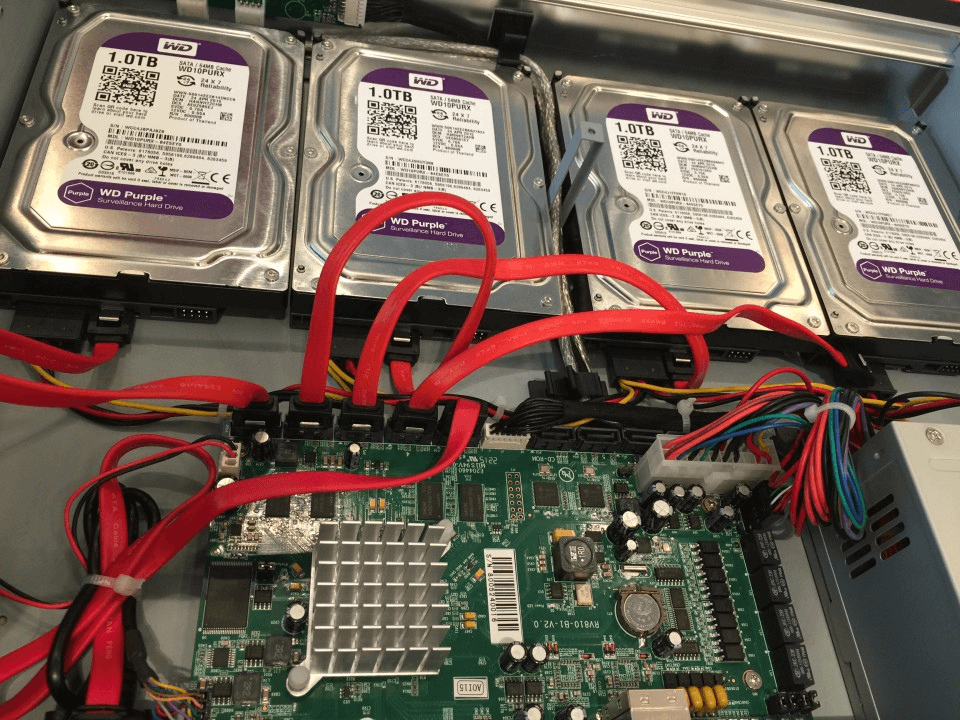
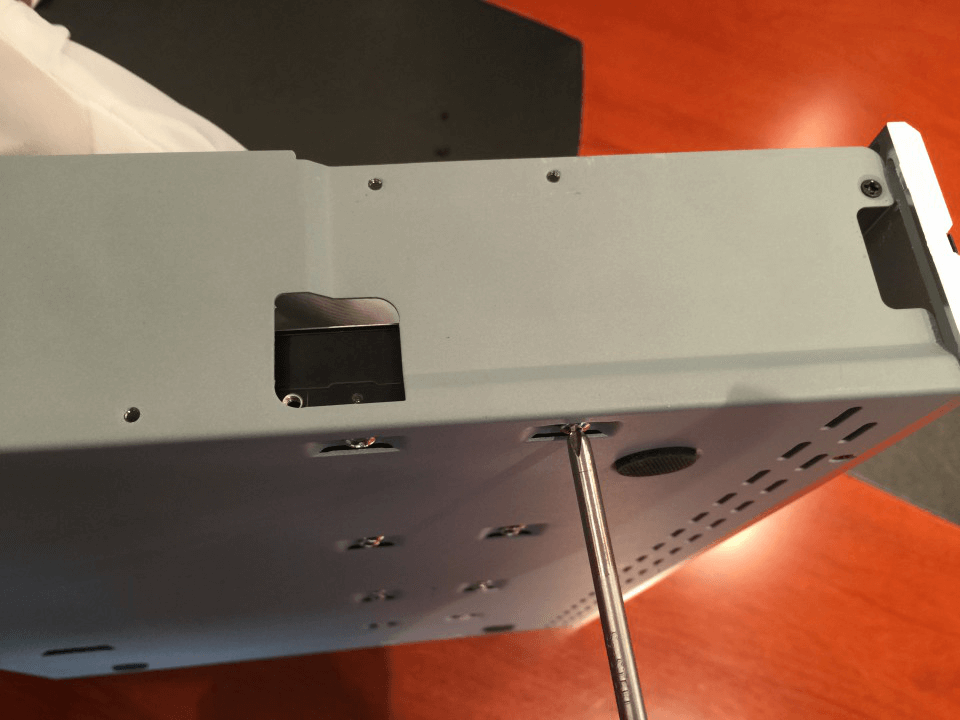
Step3: Install the hard disks into NVR with screws showed in below pictures.(SATA slots of hard disks should be toward inside NVR)
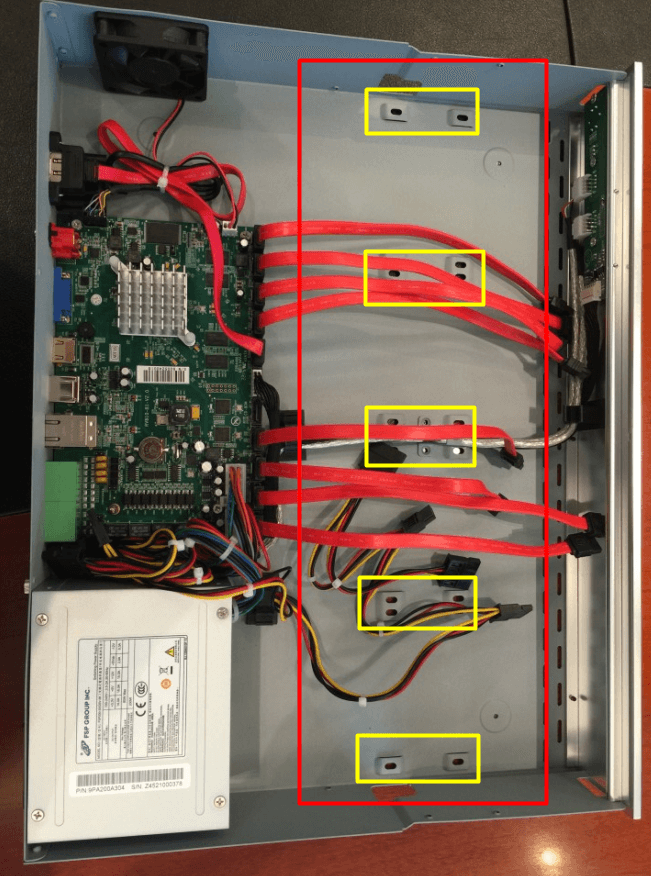
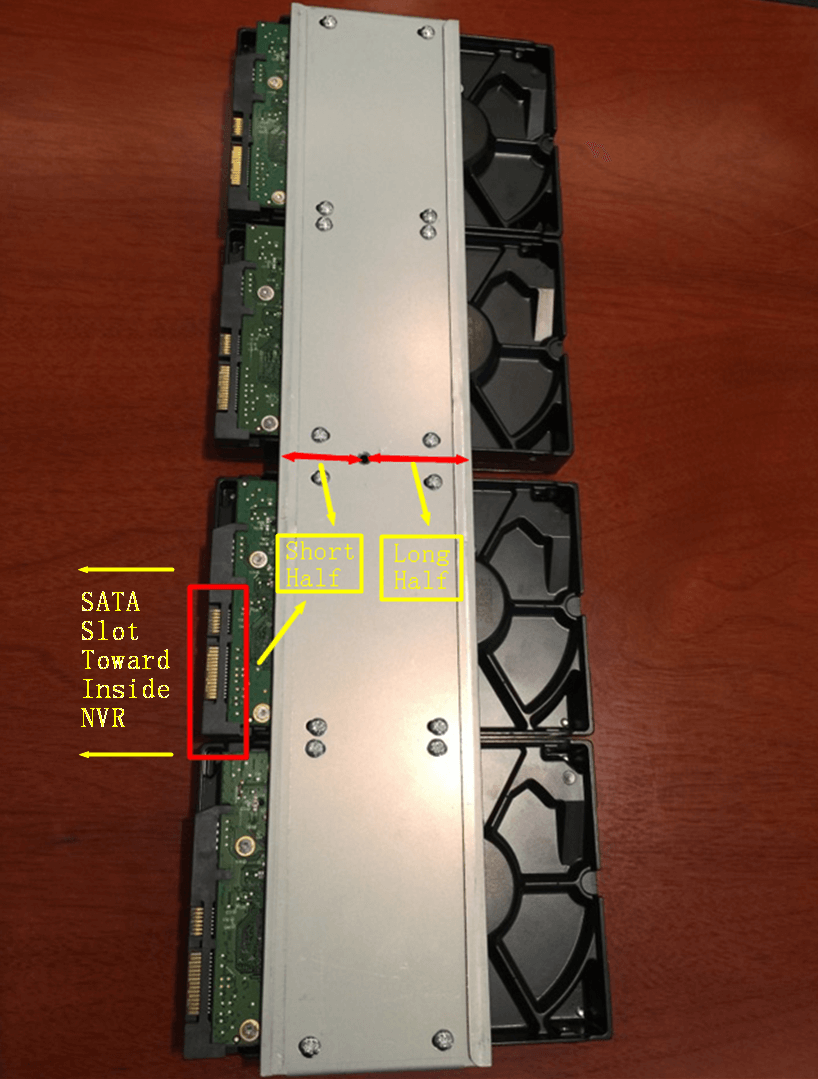
Make sure that the sata slots are in SHORT HALF side and the sata slot toward inside NVR.
Step4: Join the power connectors to corresponding hard disks.(Install lower hard disk panel before upper one)

Step5: Join the data connectors to corresponding hard disk.(Check the connection by below sequence)
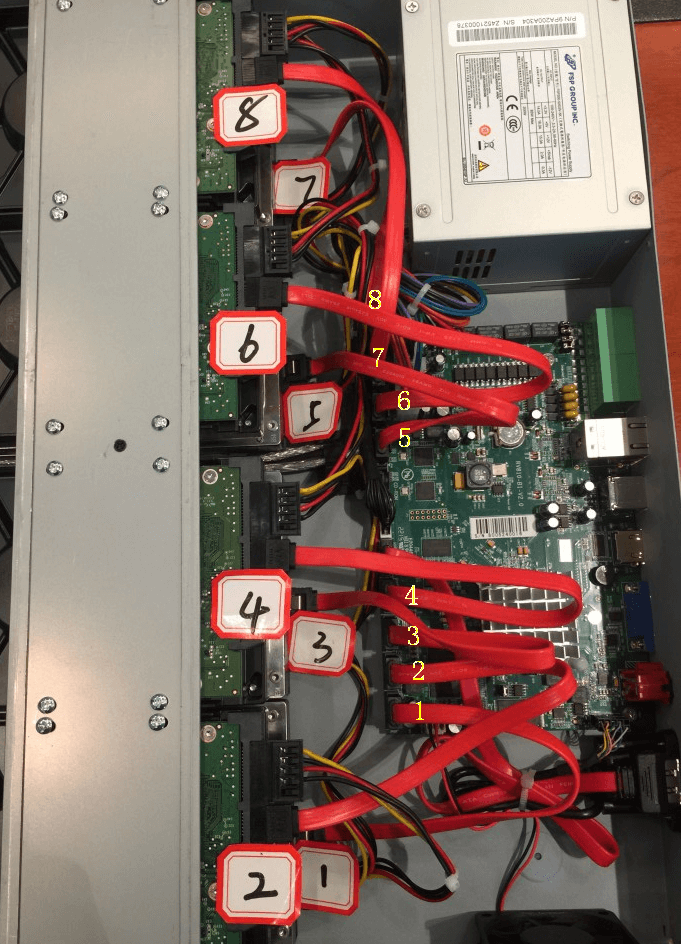
The data connector sequence of MS-N7000 series is different from MS-N8000 series.